Most requested trips
Travel categories
Travel types
Departures by month
Helpful Tips
The following are some informational pages with tips and guidelines that can serve as a basis for preparing the gear and materials to bring on walking trips. These are just quick notes—not simplistic—but designed to help walkers with less experience or a bit of uncertainty.
The following are some informational pages with tips and guidelines that can serve as a basis for preparing the gear to bring on walking trips. These are quick notes—not simplistic—but meant to help walkers with less experience or some uncertainty.
We will cover the following topics:
- the context: what kind of walking trip awaits us?
- the importance of socks and footwear and how to choose them
- choosing the backpack
- what to pack in the backpack: a suggested list
The Context and Type of Trip
Some walking trips include luggage transport: with this service, during the day you only need to carry a small backpack for daily necessities (water bottle, packed lunch, clothing to protect against rain or cold, hat, and a few other essentials), while everything else (needed for the night, personal hygiene items, change of clothes, slippers, etc.) is delivered directly to the accommodation where you will spend the night. In this case, preparing a light daypack is relatively easy.
Another common type of walking trip, especially on “pilgrimage routes,” involves staying and eating in equipped accommodations, so there is no need to carry a tent, sleeping mat, or cooking equipment.
However, it is essential to carry the rest of your belongings in your backpack: spare clothes, personal hygiene items, slippers, etc.
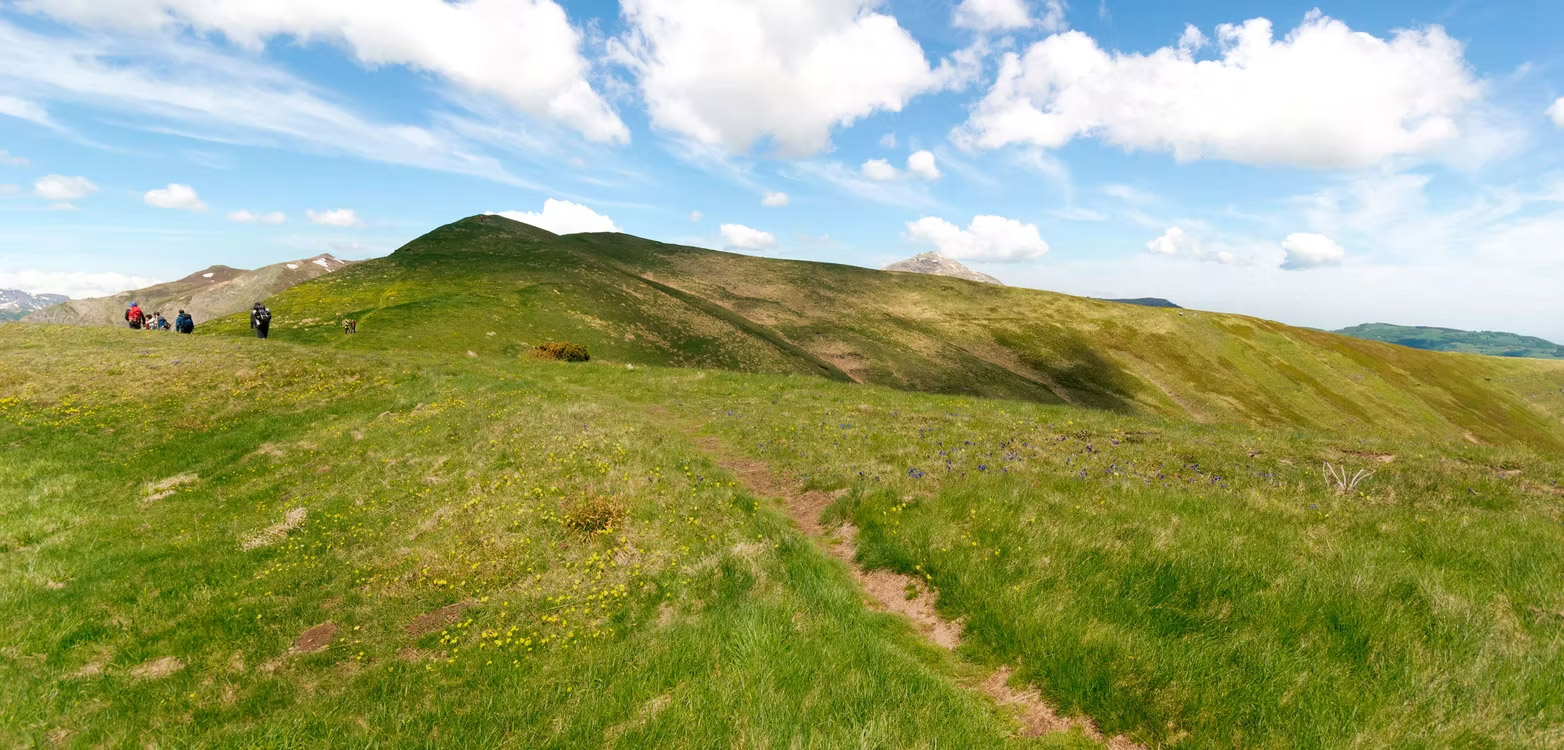
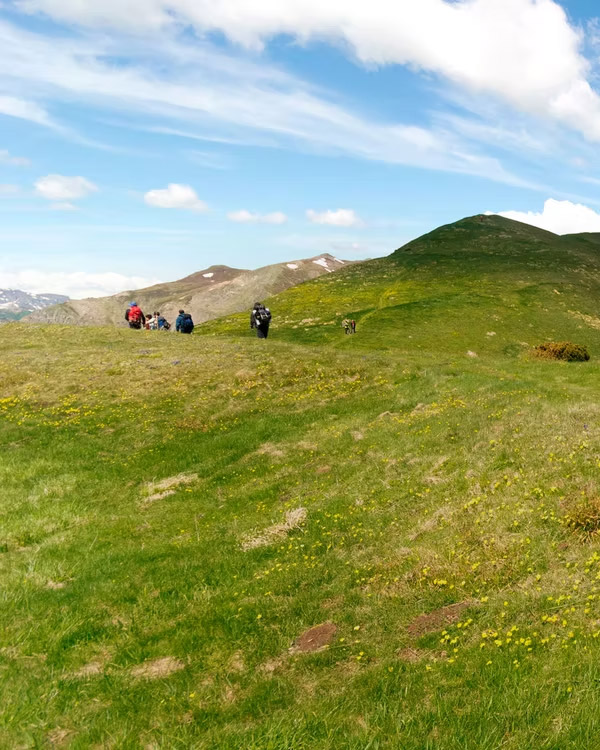
It is also important to consider the context in which you will be traveling: trekking in a natural environment, perhaps staying in mountain huts or other isolated accommodations, is very different from following a route that passes through villages, towns, and small cities, where shops, pharmacies, and other services are readily available.
Tips for Choosing Footwear and Socks
The foot is the foundation of any walking journey, so the more comfortable you feel with every step, the greater your overall well-being will be. Proper footwear helps prevent discomfort and injuries, allowing you to fully enjoy your slow-paced walking experience.
Below, we provide some guidance on choosing socks and shoes.
Socks
Socks are a cornerstone of a hiker’s clothing; nevertheless, their importance is often underestimated, their selection is neglected, and low-quality products are used.
First of all, the materials they are made of are crucial. Cotton should be avoided at all costs, as it is heavy, absorbs a lot of moisture, and does not dry quickly.
For this reason, cotton is unsuitable for ensuring the “dry-on-skin” conditions that are better provided by technical materials.
A wet, overheated, and rubbing foot can more easily develop redness and blisters. While these can still occur with technical materials, the likelihood of their appearance is significantly lower.
Materials
The preferred materials for socks are modern synthetic yarns and merino wool. Even in merino wool socks, however, the wool is usually blended with some nylon (polyamide) to increase the durability of the natural fiber, and a bit of elastane to ensure elasticity and fit: a sock made entirely of merino wool would wear out too quickly relative to its cost.
This is why major brands in the sector generally produce merino wool socks with a variable percentage of synthetic material, typically between 20% and 40%.
Merino wool keeps the foot fairly warm and is excellent for winter, but there are also thin or ultra-thin merino socks suitable for warmer conditions.
Modern socks made entirely of synthetic fibers — usually polyester with added nylon and elastic fibers — dry very quickly, making it easy to wash them in the evening and have them dry by the next morning, especially in warm seasons.
Thickness of socks
Socks are made in different thicknesses: generally, thicker socks are suitable for very cold climates, while thin socks are better for warm conditions. Medium-thickness socks work fairly well in varied weather conditions, as long as it’s not extremely hot or cold.
In summer, especially if you choose merino wool, it’s best to use thin socks to avoid overheating your feet.
Never forget that thickness affects the fit of your shoes: a shoe that fits well with a thin sock may feel too tight if you wear a thick sock.
This should be considered when choosing footwear: it’s better to buy shoes while wearing the socks you will actually use on the walk. For this reason, socks should be chosen before the shoes…
We repeat: socks are a fundamental garment, yet too little time and money are usually spent choosing them. If necessary, it’s better to save on other equipment rather than on socks and shoes.
Shoes
Regarding shoes, always remember that the correct size and fit are crucial: it is important to try on several models in the store for a sufficient amount of time before purchasing, using the same technical socks that will be worn on the walk. Keep in mind that during long walks, the feet tend to swell slightly in the second half of the day. Therefore, it is ideal to try shoes in the afternoon.
Also remember that a slightly larger shoe can always be “adjusted” by wearing a slightly thicker sock or using an insole; but a trekking shoe that is even slightly too tight cannot be “stretched” and will make walking comfortably for many hours difficult.
It is good practice to keep toenails short so that they do not rub against the inside of the shoe, which is especially important when facing steep descents. In specialized stores, there is usually an inclined platform to try shoes on: this helps to check if the toes touch the front of the shoe when going downhill. This “toe bumping” should not occur, so if discomfort is felt on the artificial downhill platform, it is necessary to choose a shoe at least half a size larger, or even more.
Size
Regarding sizing, don’t rely solely on the numbers: shoes of the same size from different brands can fit quite differently. Always choose based on how the shoe feels on your foot, not on the size you normally wear in everyday shoes. For example, just because a man usually wears a size 42 in leather shoes does not automatically mean the same size will fit in hiking boots. He might need a 43 or 43½, and that is completely normal.
Comfort is what matters most: your toes should move freely in the front of the shoe, without hitting the toe box, while the foot should not slip inside the shoe once laced up.
Keep in mind that different brands have different fits: most brands tend to have a narrow last, a few offer wider options, and almost all provide women-specific models—with narrower heel areas. You need to try many shoes and not choose only based on color or appearance, but by considering overall comfort and stability. For the same foot length and shoe model, a shoe could be perfect for someone with a narrow foot and terrible for someone with a wide foot. You first need to understand your foot type and choose brands and models accordingly.
Obviously, after several attempts and a few “wrong” purchases, experienced hikers eventually find “their” shoe—a specific model from a specific brand that is almost perfect. In that case, the size becomes reliable, and you can then buy that model almost “sight unseen.”
Sole
Good hiking shoes should have a solid, yet not rigid sole; in fact, the flexibility of the material is very important to allow a natural rolling motion of the foot and to enhance proprioception and responsiveness of the foot’s sole.
Of course, there are situations where a stiffer sole can be helpful: very rough terrain, or loose surfaces such as rock debris or constantly muddy ground. But for less challenging surfaces (well-trodden paths, dirt roads, even asphalt), a more flexible sole will better follow the natural movement of the foot.
The compound and tread pattern of the sole are also very important: to get an idea, it is enough to explore thoroughly the website of a reliable company like Vibram, whose soles are used by many shoe manufacturers, and see how the tread design and density of different soles suit different types of terrain.
If you will be walking on relatively compact surfaces, possibly with some asphalt sections, as often happens on “long-distance trails,” it is probably better to avoid soles with large, stud-like treads — like those on soccer or rugby shoes — as they will wear out quickly. This same type of tread, however, is excellent for muddy or very loose terrain.
High or low shoes?
The high-ankle shoe protects the ankles from possible bumps, makes it harder for stones and dirt to get inside the shoe, and prevents water from entering from above when crossing puddles or shallow streams.
The sole is a very important element of the shoe, as it must provide grip on the terrain thanks to the type of compound and tread pattern.
The low shoe, on the other hand, allows better ventilation for the foot, is less “restrictive,” lighter, and causes less fatigue on long distances.
Contrary to popular belief, a high lacing does not prevent sprains, which can also occur with high boots above the ankle, although for some people they provide greater support—more of a “psychological” than physical type.
Therefore, except in the most “extreme” weather and terrain conditions (snow, ice, rocky debris, scree) where boots are definitely preferable, the choice between high or low shoes is subjective. Some feel comfortable only with heavy boots, even on paved roads on hot summer days, while others cannot tolerate them and therefore almost always use low-laced, very light models.
Which model to choose?
While personal preference always matters, as a general guideline we can offer the following. In non-winter conditions, for a “cammino” or trek that doesn’t include particularly technical sections, both rigid and heavy mountaineering/hiking boots and regular road running shoes with minimally treaded soles should be avoided.
Instead, robust low trail running shoes or lightweight hiking boots, not too high at the ankle, with a sufficiently flexible sole and adequately sculpted tread, are quite suitable.
Never start a journey with new shoes!
Finally, a word of caution: never set out on a long hike or a multi-day trek wearing new shoes. Fortunately, modern shoes made of synthetic materials start to mold to your feet after a few walks, unlike traditional leather boots, which required a “breaking-in” period that could last several weeks.
However, it is still advisable to use shoes that are already properly broken in for your trek. After trying them on in the store and purchasing them, it’s a good idea to wear them at home for a few hours at a time, keeping the tags on: this way, if you realize that the size is too small or there are pressure points, you can request an exchange at the store in the days immediately following the purchase.
Later, before using the shoes for long hikes or multi-day treks, it’s recommended to wear them in everyday life — if social conventions and your work attire allow it — and then on short walks, in order to “soften” them.
This brief breaking-in period will help prevent or at least limit problems that might arise during the longer stages of a trek.
Practical tips for choosing your shoes
To wrap up this topic, here are some tips for choosing the right shoe size.
- Forget about your “usual” shoe size: hiking shoes fit differently, and sizes vary from one brand to another. Consider whether you can wear narrow shoes or need a wider fit. Always choose based on how the shoe actually feels on your foot, not the number you think you wear. Shoes need to be tried on—and not just for a couple of minutes. Of course, if you have been happily wearing a certain model of a certain brand for years, you can take a bit more of a “blind” approach.
- Try the shoes with the technical socks you’ll actually wear: a shoe that fits perfectly with thin socks may feel uncomfortable when thicker socks are worn. Keep this in mind!
- Try on shoes in the late afternoon, perhaps after a long day: feet tend to swell as the day goes on, so it’s best to buy shoes that can accommodate this expansion.
- Try on both shoes, not just the right or left one: although the differences are minimal, your feet are never perfectly identical, and you might end up choosing the wrong fit.
- With the shoes laced up, the shoe should feel secure on your foot but not constrict it. There should be enough space for your toes: move them up and down, contract and spread them. If this is impossible or causes even slight discomfort, the shoe is too short, has a narrow toe, or an unsuitable volume (or a combination of these factors).
- Spend some time trying the shoes in the store: walk around a bit, tap the toe, sit down, stand up. Specialized stores usually have a sloped platform to walk back and forth on: this helps you see if your heel slides too much uphill, or if your toes touch the inside of the shoe downhill. Even the slightest discomfort at the toes when descending means you should go at least half a size up.
- Once you’ve purchased the right shoes, wear them at home for a few hours in the days immediately after buying them, keeping the tags on and saving the box: if you notice any fitting issues, you can always return to the store with the receipt to request a different size.
- Without overthinking numbers, remember that a slightly larger shoe than your exact size can still be worn comfortably with thicker socks. A shoe that is too small or narrow cannot be “fixed” in any way.
Backpacks
The backpack is perhaps the piece of equipment that, along with footwear, can most significantly affect the enjoyment of walking. Clearly, if the load carried is too heavy, even the best backpack won’t make it feel lighter; but a poorly designed backpack that doesn’t fit your body properly can be uncomfortable even with relatively light loads, especially on long treks.
Types of backpacks
Backpacks can mainly be categorized based on the suspension system (with a rigid frame or frameless) and their capacity (measured in liters), which varies depending on how much gear you need to carry on your shoulders.
Size: small, medium, or large?
There are backpack models designed specifically for women that take into account the morphological differences between the sexes.
It should also be noted that quality backpacks are made in different sizes, meaning dimensions suitable for people of varying heights, just like a sweater or a shirt: since a backpack has specific points of contact (back, lumbar area, hips) and is supported by shoulder straps and belts, all these elements need to fit different body types as well as possible. Therefore, a backpack that is perfect for someone 160 cm tall will not work as well for someone who is 195 cm tall, possibly with different body proportions.
The key measurement is the so-called torso length: based on torso length, manufacturers recommend a specific backpack size. In general, backpacks are made in Small, Medium, and Large, but some models are available in only two sizes (S/M and M/L). By knowing your torso length, you can choose the most suitable size by checking the correspondences on the manufacturer’s website, also keeping in mind that some models allow for some adjustment of the back panel length.
Suspension systems: with or without a rigid frame
One fundamental way to categorize backpacks is based on the presence or absence of a rigid frame.
Frameless backpacks
This type of ultralight backpack offers several advantages: it fits closer to the body, promoting better balance; it is lighter; and it forces you to carry less, encouraging choices that reduce the overall weight from the start.
However, the disadvantages should also be considered: frameless backpacks are structurally unsuitable for carrying heavy loads, and their close fit to the back can cause significant sweat accumulation.
Backpacks with a rigid frame
Rigid internal frames can generally be made using one or a combination of these systems: one or more flat longitudinal bars, a pre-shaped frame, or a peripheral tubular frame that tensions a mesh resting against the back.
Backpacks with an internal rigid frame have the disadvantage of being heavier than frameless models of similar capacity made with comparable materials. The advantage, however, is that their greater rigidity and structure allow these models to carry heavier loads without risk of collapse.
Size and capacity
The capacity of a backpack is a volume measured in liters. The standard method for measuring capacity involves filling each backpack with balls of a standard size and then, once emptied, measuring the volume of these balls in liters.
Be aware, however, that not all manufacturers use a standardized measurement system. Some measure only the main compartment and do not include large pockets or small compartments; others provide the total volume, including both the main compartment and the sum of all pockets and compartments.
Clearly, this makes it difficult to compare the capacity of two backpacks from different brands based solely on a single number. It is therefore important to understand what the liter volume actually refers to in a backpack, and to also assess its size empirically, rather than relying only on the numbers provided by the manufacturers: two backpacks both labeled as 30 liters, but from different brands, can have noticeable differences in actual capacity.
For the purposes discussed in this guide, namely walking trips with overnight stays in accommodations, a backpack with a capacity of roughly 30 to 40 liters will be suitable, with larger volumes recommended for cooler climates.
Of course, for day trips or situations where you carry minimal luggage, smaller backpacks of 20-25 liters will suffice, while for trekking with a tent, sleeping mat, and sleeping bag, plus possibly cooking equipment and food, larger capacities will be required.
Packing and wearing your backpack
How to pack your backpack
First of all, keep the items you use most frequently in the outer and easily accessible parts of the backpack (such as water bottles in the side pockets) or items that — like sunscreen, insect repellent, hat, sunglasses, and so on — may be needed in various situations throughout the day.
Equipment that may be needed during the day, but not too often, should be placed in the upper part of the main compartment of the backpack or, if available, in the top pocket: rain gear, hygiene kit, utility kit, etc.
Finally, place at the bottom of the backpack the items that are only needed in the evening, such as spare clothing, sleeping bag liner, and so on.
It is also important to try to distribute the weight according to your center of gravity so that the backpack does not throw you off balance: keep the backpack as close to your back as possible, especially for larger or heavier backpacks.
Wearing and adjusting your backpack
Putting on and adjusting your backpack should be done from the bottom up. With all straps slightly loosened, follow these steps:
- Put on the backpack by slipping your arms through the shoulder straps;
- Lean slightly forward and tighten the hip belt so that its padding and lumbar support fit snugly around
- the lower back and hip area, where the weight will rest and be supported;
- Then, pull the shoulder strap adjustment straps so that the buckles are roughly near the armpits and the backpack back panel sits properly against your back;
- Fasten the chest strap, without tightening it too much, to prevent the backpack from moving side to side;
- If present, pull the load-lifter straps located above the shoulder straps so that the load feels evenly distributed; they should form an angle of about 45°, although it can be slightly smaller or larger;
- Finally, slightly loosen the shoulder straps adjustment.
Clearly, the hiker should learn to adjust the backpack according to their own body sensations, always keeping in mind that the weight should be distributed proportionally, with more support on the hips and less on the shoulders.
Example of a gear list
Below is an example of a basic gear list. Of course, each hiker will add — without overdoing it — or remove items based on their own needs, preferences, and the type of itinerary. We repeat that, in cases where towns and villages are crossed, common items can usually be found in stores if needed; whereas for routes through less populated areas, it will be necessary to bring materials and equipment that won’t be available along the way.
Clearly, different needs should also be considered based on gender: some items essential for a woman may not be for a man, and vice versa. This is a basic list that can serve as a reminder and can be adjusted as needed.
The ellipses (“…”) present in several parts of the list indicate that it is open to modifications and additions.
For example, many hikers use walking poles to assist their steps, while others do not: whether to bring them or not depends on personal preference.
The list is intended for a walking trip:
- lasting several days;
- with overnight stays in accommodations (no tent, no sleeping mat, no sleeping bag);
- with breakfast and dinner provided in accommodations (no stove, no pots, no utensils);
- taking place in mild weather conditions (no high mountains, no winter months, no ice or snow); of course, it is important to consider the specific expected weather conditions for each trek in that particular area and period.
Clothing
Next to each item, notes are included when relevant.
Clothing worn
We start with what is worn while walking and therefore will not be stored in the backpack.
- Shoes (see above for selection tips)
- Socks (see above for selection tips)
- Underwear (synthetic or merino wool, to prevent chafing and irritation)
- Short-sleeved shirt (synthetic or merino wool)
- Pants (preferably long for routes in wooded or more “wild” areas)
- Shirt / sweatshirt / long-sleeved top / windbreaker, etc. (depending on external temperature)
- Hat and sunglasses (for very sunny days), beanie (for colder days)
Clothing carried
Now let’s move on to the contents of the backpack, starting with additional and spare clothing.
Two tips: first, it’s best to keep them in waterproof, securely closed bags to prevent them from getting wet in case of heavy rain (backpacks are not waterproof, except for specific models designed for water activities); second, bring as few spare clothes as possible, washing each evening what was worn during the day (consider carrying a small bottle of gentle liquid detergent if needed). This greatly reduces the backpack weight.
Spare clothing
The minimalist choice, which saves weight, suggests bringing only one item for each spare piece, washing everything in the evening, and using the same clothing for sleeping that will be worn for walking the next day. But let’s be generous and assume bringing two of each, in addition to what is worn.
- Underwear (2 pairs)
- Shirts (2)
- Socks (2 pairs)
- …
Additional clothing
- Pants (1 pair, depending on whether it’s needed)
- Sweatshirt or sweater (based on expected weather conditions)
- “Warm” jacket (for relatively cold environments)
- Scarf / bandana / tubular “Buff” (useful in many situations if the weather requires it)
- Light liners (very thin synthetic, useful in sudden cold, but also in other situations)
- Warm but lightweight beanie (useful in sudden cold)
- Waterproof poncho / rain jacket + pants
- …
Additional footwear
Do not forget a pair of lightweight synthetic slippers to use in the evening after removing your walking shoes.
Hydration
- Water bottle / flask with at least 1 liter capacity (one or two, depending on the availability of potable water along the route) / hydration bladder inside the backpack
- Cup / mug (lightweight metal, silicone, or hard plastic; not essential, but can be useful).
Personal hygiene kit
Even on the most basic and adventurous treks, it is important to take care of personal hygiene as best as possible. You don’t need much, but some items are essential.
In most cases, the accommodations where you sleep already provide soap, shampoo, and other consumables, but this is generally not the case in hostels and mountain huts.
We therefore recommend, when necessary, to repack consumable products (soap, creams, etc.) into small containers, carrying only the amount needed for the duration of the trip, or to use products in sachets or single-use packages.
- Toiletry bag (a lightweight nylon or mesh bag, avoiding the classic semi-rigid cases, which are too heavy)
- Toothpaste (in small tubes)
- Toothbrush and dental floss (which can also be used as repair thread…)
- Toilet paper (accommodations usually provide it, but carrying a small amount in your backpack can always be useful)
- Sunscreen
- Lip balm
- Insect repellent
- Nail clippers / small scissors (especially for longer multi-day hikes)
- Foot cream (not essential, but useful for treating skin stressed by long walks)
- Soap / shower gel (not necessary in most cases, in small containers)
- Hand sanitizer (essential during the day outdoors, after toilet stops, and before eating a packed meal)
- Microfiber towel (a large one if staying in accommodations that don’t provide towels, always useful to have a small, lightweight one)
- Wet wipes, deodorant, cotton swabs, shaving products, makeup products (decide case by case what to bring or leave at home)
- …
Utility kit (for repairs and emergencies)
If you are on a trip with professional guidance, the guide will usually have an adequate kit for repairs and emergencies. However, self-sufficiency is a positive goal to aim for, so we provide some suggestions, albeit incomplete.
- Sewing kit (a couple of needles of different sizes, some strong thread, a few safety pins, a plastic thimble)
- Cord (not essential, but a small 5–10 m length of thin cord can be useful for many things, from repairs to drying clothes…)
- Adhesive tape (very useful for many repairs, especially “duct tape” or similar)
- Knife / multi-tool (the classic Swiss knife or multi-tools with pliers)
- Lighter (useful in various situations, even just to seal the end of a synthetic cord)
- Emergency blanket (the “space blanket” or Mylar blanket is essential, in some cases it can save a life; it’s cheap, light, and it’s always good to have one in your backpack)
- …
First aid kit
Se siete in un viaggio con accompagnamento professionale, sarà in genere la guida ad avere un adeguato kit per le riparazioni e le emergenze. Ma l’autosufficienza è un positivo obiettivo a cui tendere, per cui forniamo qualche indicazione, seppur incompleta.
- set cucito (un paio di aghi di misura diversa, un po’ di robusto filo da cucito, qualche spilla da balia, un ditale di plastica)
- cordino (non è indispensabile, ma una matassina da 5-10 m di cordino di piccolo spessore può servire a tante cose, dalle riparazioni all’asciugatura dei panni…)
- nastro adesivo (molto utile per tante riparazioni, specie se del tipo “americano” o duct tape)
- coltello / pinza multiuso (il classico coltello svizzero o gli attrezzi multiuso con pinza)
- accendino (utile in varie situazioni, anche solo per saldare il capo di un cordino sintetico)
- coperta di emergenza (la “metallina” o coperta di Mylar è un elemento indispensabile, che in certi casi può salvare la vita; costa poco, pesa poco ed è bene sempre averne una nello zaino)
- …
Ottiche ed elettronica
- torcia frontale / torcia elettrica a mano (utile avere una fonte di illuminazione, specie nei periodi con giornate più corte, oltre che per muoversi al buio in rifugi e ostelli)
- binocolo (eventualmente per chi fosse particolarmente interessato all’osservazione naturalistica)
- attrezzatura fotografica (eventualmente per chi è fotografo / videomaker)
- telefono cellulare con caricabatteria
- power bank (quando non si abbia accesso alle prese di corrente per più giorni)
- …
Cancelleria e materiale per l'orientamento
Da valutare, in base al tipo di viaggio e alle proprie preferenze, cosa eventualmente portare tra taccuino con penna/matita, mappe topografiche, strumenti per l’orientamento (bussola, altimetro, ricevitore GNSS) e così via.
Documenti denaro
Due consigli importanti per ridurre il peso: primo, evitare portafogli completi, magari in pelle, che pesano moltissimo, più del loro contenuto, e preferire invece una leggera bustina in materiale sintetico, con la zip; secondo, non portare interi mazzi di chiavi ma solamente quelle che effettivamente serviranno per rientrare in casa e per l’automobile (nel caso si usi questo mezzo per raggiungere il punto di partenza del trekking).
- bustina “portafoglio” (leggera e sufficientemente capiente)
- documenti (carta di identità, tessera sanitaria, patente auto, eventualmente passaporto etc.)
- denaro / carte di pagamento (portare una adeguata quantità di denaro contante per quelle situazioni più “remote” in cui non è facile trovare sportelli bancomat lungo il percorso e non tutti gli esercenti accettano le carte di debito/credito)
- …
Fermiamoci qui e ribadiamo che si tratta di una lista indicativa buona come base di partenza, ma da modificare, integrare o ridurre in relazione alle preferenze di ognuno e al contesto geografico e climatico nel quale si svolgerà il trekking.
Il peso massimo dello zaino
Non sviluppiamo qui il tema dell’alleggerimento dello zaino, con le varie strategie ultralight per caricarsi sulla schiena il minor peso possibile. Basti sapere che, per camminare con comodità, senza avvertire eccessivamente il peso del carico, lo zaino a pieno carico dovrebbe pesare circa il 10% del proprio peso forma corporeo.
Vale a dire che una persona il cui peso forma è di 75 kg non dovrebbe portare uno zaino più pesante di 7,5 kg. Se è meno, è meglio.
Ma ricordate che stiamo parlando di viaggi a piedi in cui non si porta tenda, materassino e sacco a pelo: quindi sarà piuttosto facile rispettare questa proporzione.